Remember when we used film in our cameras? (Kids now: “How retro!”) We had a finite number of photos to take: 24 or 36. There was work to be done before you could see those pictures. A trip to the Fotomat or Pay & Save, then later, Costco, to drop off the film. Days later, you’d go again to pick up the photos and the negatives. I recall being so excited to see the pictures from a family vacation, or birthday party, or holiday! Out of that 24- or 36-roll, you’d get a handful of really good ones (or at least, good enough for the photo album). The rest went back in the envelope and got put in the shoebox with the other photo envelopes.
With digital cameras and smartphones having bigger and bigger storage capacities, the infinite nature of photographing anything is now standard for most people. A child’s birthday party could have a few hundred photos; a long trip abroad could have over a thousand! The advantage is you can re-take photos several times to get it just right; the disadvantage is you end up with an enormous amount to cull through later. How to begin organizing your thousands of printed and digital photos? Use these five steps to help ease this task.
1. What Are Your Goals?
Before you begin, decide on what your photo goals are. A few examples:
- Organize my old printed photos and create photo albums.
- Combine all my digital photos into one storage drive.
- Scan my printed photos and combine them with the digital ones.
- Label my photo storage system so I can find what I need quickly.
- Cull my digital photos and create a storage file system plus a backup.
When you have decided what it is you’re looking to achieve, it will be easier to work on your photos with these goals in mind.
2. Locate all your photographs.
There may be more out there than you initially thought! You likely have photos stored throughout your home and your electronic storage.
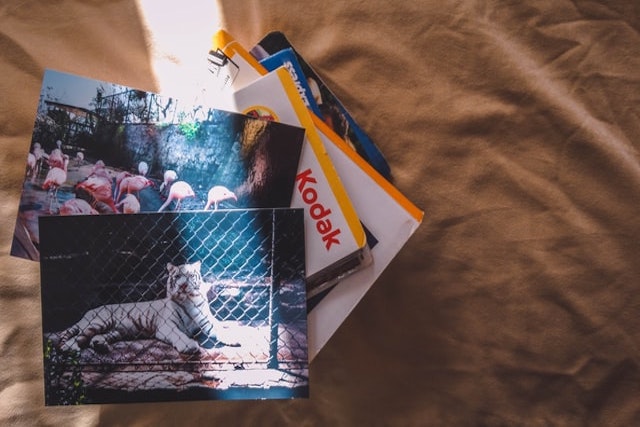
Printed photos — Photo albums, photo boxes, portrait packages taken by a professional, kids’ sports photos, old photo boxes passed on to you from relatives, photos on the refrigerator and bulletin boards, scrapbooks, file folders. And of course, undeveloped film. Assemble all your photographs on a not-used-much surface where you can leave them for a few days, such as a dining table or a guest bed. This gives you a dedicated place to work on going through all your prints.
Digital photos — Cell phones (old and current), old SD cards, hard drives (on all your computers), photo CDs, tablets, photos in your Cloud storage, flash drives, social media uploads. Download or upload these digital pics to one storage source, such as your computer. Once you have successfully transferred the photo files, you may delete the originals on the other device.
3. Sort your photos into groups.
Once you’ve gathered all your photos in one spot, it’s time to sort them. Group them by year, then by month, then by events. Whether you are sorting printed or digital photos, organize them into folders by year, then subfolders under each year for months, and within each month, subfolders for events.
Organize your printed photos in file folders or gallon ziplocks; don’t forget to label these. Temporarily store them vertically in a box or bin.
Organize your digital photos using your computer’s hard drive folder system. Make sure you are backing up your computer regularly, whether it’s to the Cloud or an external hard drive!
4. Delete and delete. Then delete some more.
Now that your photos are grouped, it’s time to cull. Do you really need 100+ photos from your daughter’s graduation? Your brother’s 30th birthday party? Your retirement send-off? Probably not. When you’ve got several photos of the same pose, group of people, or scenery, pick two or three of the best and get rid of the rest.
For your printed photos, as you whittle down each year’s contents, you can start placing them into photo storage boxes with a more detailed labeling structure. If you decide later to digitize your printed photos, already having them culled, sorted, and labeled will make it so much easier to incorporate them into your digital photo storage system.
For your digital photos, you can go deeper with digital photo organizing once you’ve finished your culling, organizing, and labeling. There are many ways to do it! If you label your photo files with details like names and events, it will be so easy to search for, say, all of your son’s lacrosse pictures across the 12 years he played (i.e., “Max lacrosse goalie”).
5. Now enjoy your photos!
There was an ad a while back for an online photo service with the slogan, “Don’t let your kids grow up to be .jpegs”. Nothing wrong with .jpegs—only if they remain sitting in storage forever! Now that you’ve spent a sizable amount of time and effort getting your photos organized, have some fun with them. A few ideas:
- Forget the hassle of sticking pictures into photo albums. Instead, upload your photos to a photo book service and let them do the hard work. Get creative, and do them by themes: “Halloweens K-12,” “Paris – 20th Anniversary,” “Disneyland 2008,” or “Kids and Grands”. (Hint: These make wonderful gifts! You can create one and have multiple copies printed.)
- Get a home hub and connect it to your Cloud photo storage, then let your thousands of photos randomly appear in an infinite slide show. We have one in the kitchen and it is a favorite for everyone.
- Parents, frame and hang up photos from when you were a kid. Create a gallery wall with a service like MixPix. Your kids will love seeing you, their aunts and uncles, and their grandparents back in the day. The hairdos and fashion statements will be a bonus!
Take a deep breath—this is a big project. Do it in chunks so you don’t become overwhelmed. Take some needed breaks every hour or so. You are sorting through your life’s images, so don’t get so tired or frustrated that you aren’t paying attention. You don’t want to accidentally throw away or delete precious memories. Enlist help from your family members, or from a professional organizer. Going down memory lane while organizing your photos could be a fun and super worthwhile project!