What’s not to love about your cleaning appliances? They don’t need payment, they don’t need to be fed, they don’t complain, and they do their job when it’s convenient for you. The least we can do is give them a bit of love. Besides, keeping these guys clean helps them run better and last longer, and even save energy.
Dishwasher
For a quick degreasing and odor removal, place a cup of 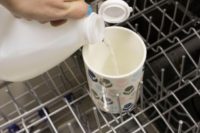 white vinegar in a dishwasher-safe container on the upper rack of your empty dishwasher. Run the machine using the hottest water cycle available. If it still smells musty after this, sprinkle a cup of baking soda over the bottom of the dishwasher, then run for a second cycle. If you’d prefer to use a dishwasher cleaner, Good Housekeeping has a list of recommended ones that handle food and grease, as well as hard water minerals.
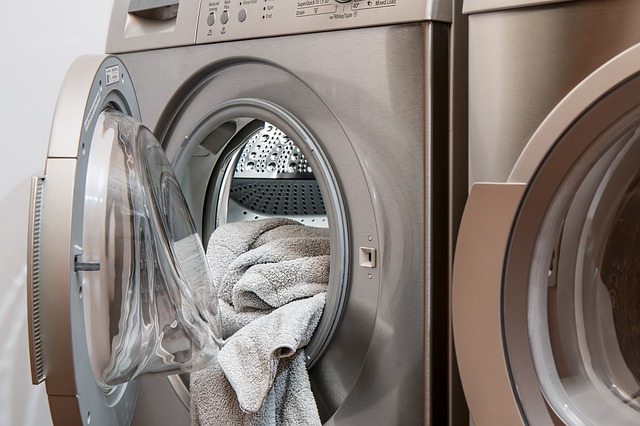
Washing Machine
Using a similar method as above, set your empty washing machine at its hottest temperature cycle, and run it with 1-2 cups of white vinegar. This helps to descale and remove mineral deposits, especially if you do this once a month as part of a maintenance schedule. For a store-bought solution, many brands such as Affresh and OxiClean offer washing machine cleaners in tablet or liquid form.
Regularly clean the rubber door gasket of your front loader with a cloth and either hot soapy water or a mix of vinegar and hot water. On both front and top loaders, regularly clean the detergent dispensers using a damp cloth to scrub off buildup and spills.
Prevent mildew and that funky smell in your front loader by always keeping the door open; it helps the interior stay dry between washes. Door won’t stay open? Check out these various washer door props on Amazon.
Dryer
The interior of your dryer should be relatively clean, as you only put clean, wet clothes in there to dry. If you do wish to clean it once in a while, a damp (not wet) cloth dipped in a diluted water/vinegar solution should suffice. Be sure to leave it open for awhile after to thoroughly dry.
 Your dryer vent is another story. Dryer ductwork clogged with lint is one major cause of house fires! If your dryer is taking longer and longer to dry, your dryer vent needs cleaning. Look at the photo to the right to see just why! Cnet gives a 5-step method on cleaning this yourself. You could also hire a professional do it; they have special equipment such as a long hose system and pressurized air. You should notice a difference immediately–in your dryer’s efficiency, as well as your energy bill.
Vacuum
Unlike your other appliances, you want your vacuum to suck. A friend of mine actually experienced her vacuum catching on fire because of a clogged hose–scary!
First, unplug it. Depending on your vacuum type, remove and empty the canister, or remove and replace the vacuum bag. If the interior of your vacuum looks very dusty, wipe down with a damp cloth. Let it air out and dry completely before replacing the canister or vacuum bag. Most vacuum canisters can be washed with warm, soapy water. Dry completely before returning it to the vacuum.
Look through the hose, if your vacuum has one. Use a straightened wire hanger or stick to poke through any clumps or clogs, and pull or push them out completely.
Check the filter once a month. If it is washable, remove it 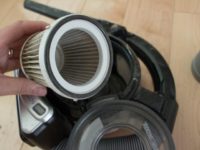 and tap it against the inside of a waste bin to knock out dust and debris. Then rinse well with warm water–do not use any soap or cleaners. Let it dry overnight before replacing. If the filter is not washable, then discard it and replace with a new one. Some vacuums may have an extra HEPA filter; be sure to check this as well, and wash or replace as needed.
Next, check the brush roller and base plate. Use small scissors to cut hair and threads carefully, and pull them out (if you have long hair or furry pets, you may need to do this often). An old toothbrush can help remove any debris stuck in an around the brush roller and base plate. Tap all the parts gently to release and shake out all the debris. Wipe down base plate with a damp cloth.
Check any attachments for stuck debris. Wipe down attachments and entire vacuum with a damp cloth. Good as new!
Doesn’t your house seem fresher and cleaner already?
Author: Myriam Gabriel-Pollock
Photo credits: stevepb, DIYNetwork, and The Fire Safety Guys