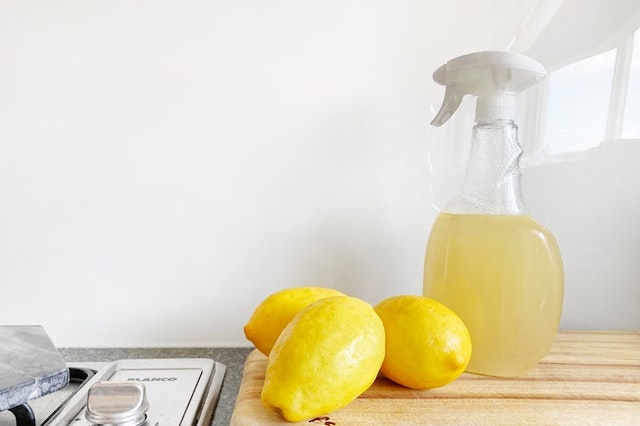
Posts Tagged organizing

How Cleaning and Organizing Can Benefit Your Mind and Body

by Elizabeth Bacharach
April 7, 2022
from Shape.com

Dusting, disinfecting, and decluttering on a regular basis can boost your mood, increase your focus, and double as low-intensity cardio. Read on to learn the secret to scoring these perks.

There’s nothing quite like coming home (or maybe just closing your laptop) after a long day of work and…cleaning.

Yes, you read that right.

While some people may exercise to destress or turn to meditation when feeling overwhelmed, I channel my inner Monica Geller and get to work dusting, discarding, disinfecting, and reorganizing my apartment. But I don’t need to be in a mental funk to start reorganizing my kitchen drawers with enthusiasm. I’ve actually been very into cleaning and organizing since an embarrassingly young age. Only now as an adult, however, have I realized that it’s actually my favorite form of self-care.

Read More

7 Steps to Cleaning and Organizing Your Computer Desktop

Your computer desktop is the first thing you see when you log in. Is your password an entry to a desktop that is cluttered with files, folders, photos, apps, zip files, shortcuts, screen shots, and other digital detritus? If so, it could very well have a negative impact on your productivity and your stress level. It’s not hugely different from having an actual desktop that is also cluttered and disorganized. A workspace, onscreen or not, that is a jumbled mess will make you feel distracted, scattered, and anxious. Read on for some tips on getting your computer desktop cleaned and organized—then watch your productivity trend upwards!

1. Make good use of your taskbar to minimize program icons.

Look at each program icon on your desktop and consider how often you use it. The ones you use daily and at least 3x a week, keep on your desktop. The rest should be moved into the Start button on a PC, or the Applications folder in a Mac’s Finder. To neaten up your desktop even more, keep your program icons on your taskbar. On a PC, pin an icon to your Taskbar by right-clicking on it; then select “pin to taskbar.” On a Mac, simply drag and drop the icon onto your Dock. This will help keep your desktop neater and save you the hassle of finding programs because all your apps are in one spot, instead of all over your screen.

Read More

De-Summer and Clean Out Your Car

School is now in full swing, and the long, lazy days of summer have given way to the regularity of school, work, after-school activities, and early bedtimes. You’ve transitioned your home and schedule to autumn’s rhythms. But have you done the same with your car? If it’s still full of July and August’s evidence, then it’s time to de-summer and clean out your car with these five steps.

Step 1: Empty the Car Interior and Trunk

I like to move my car to the driveway so I can work with all the doors wide open. If you’ve got items such as carseats, cargo organizers, sports equipment, beach toys, dog mats, etc., take them out of the car. Create two groups: items that need to go back in, such as carseats, and items that can be stored elsewhere (e.g., beach toys).

Step 2: Take Out the Trash

Take a small garbage bag and pick up all the trash. Inside the car check every door jamb, under the seats (best to move them forward/back to get everything), seat pockets, storage compartments, and the glove box. Chances are you will find all kinds of stuff! Food wrappers, empty ziplock bags, small toys, tickets stubs. You may also find things that were “lost”, such as your teen’s ASB card from last year.

Step 3: Clean It Like You Mean It

Take the mats out of the car. Use a car vac or a regular vacuum with a hose and crevice attachment, and thoroughly vacuum all the seats, floors, and trunk. If the storage compartments and cup holders need it, vacuum them, too. Next, use a damp towel to wipe up any seat stains; use stain remover on upholstered seats if need be. For leather seats I like the Armor All Leather Wipes. Wipe all interior surfaces—dashboard, console, steering wheel, doors—with a damp microfiber cloth. Use another microfiber cloth dampened with a mixture of equal parts white vinegar and water to wipe all the interior windows and any glass surfaces on your dashboard.

Read More

Guide to Organizing Your Garage

We’ve got a few eye-opening statistics about garages. A U.S. Department of Energy survey found that 1 out of 4 of people with 2-car garages couldn’t park their car in it because it’s used to store other things. Another survey by the National Association of Professional Organizers (NAPO) found that 1 out of 2 homeowners named their garage as the most disorganized area of their house. Furthermore, more than half of homeowners plan to get their garage organized within the next two years. Does this sound familiar? Reclaiming your garage is a major project. Use our step-by-step guide to organizing your garage and park your car inside (yahoo!).

1. Set aside a large block of time for this project—garages typically take 12 hours for general clutter.

Plan for 3 or 4 time blocks of 3-4 hours each; most likely, it will be multiple weekends. Don’t wait until winter, when days are shorter and the garage will be freezing cold. If you can, pick at least the first weekend with no rain—you’ll need to take most items out of the garage.

2. Enlist helpers and make a task list.

Family or friends can certainly help; be sure they understand what they’ve signed up for and won’t become distractions. If you’ve got young kids, hire sitters or plan a weekend at the grandparents. Make a task list and give your helpers specific assignments with a time deadline. For instance, your teen can go through all the sports equipment and toys, while your spouse tackles the shelves full of tools and paint cans. We typically send two organizers out together for garages and work in 4-hour time chunks hands-on with clients. Clients are tired at the end of the session!

3. Move everything out of the garage.

Park your car(s) elsewhere so the driveway can be a staging area. Take the contents out of your garage and place in the driveway. If something is immediately trash or donation—non-working, broken, or outgrown items—set it in these separate piles.

Read More

Organizing Strategies – Make it Simple; Make it a Habit; Adjust it; Stick With it

Make It Simple

There is one big mistake everyone makes when they begin to get organized. Want to know what it is? Containers, baskets and bins. That’s right. People rush out and buy lots of containers before they know what they need and before they sort through what they have.

Here’s how to approach the organizing process. We like to call it the Clutter Clearing System.

Step One: Form a vision for the space.

Let’s take the kitchen. Family is coming over and you’ll be hosting the holidays. Are the counters cluttered? Are the drawers packed full?

Read More

Three Ways to Use Laundry Room Storage Effectively

laundry room cabinet

Laundry rooms are more than just a place to wash and dry your clothes. Any extra storage can be used to store cleaning supplies, back stock of household products and infrequently used household items. Create designated storage areas, zones, for each group, such as in these three examples.

Zone 1: Laundry Care Products

Store laundry detergent, fabric softener, and stain removers in one location. Keep all laundry detergents and supplies together and within reach of the washer and dryer. Label the shelf so that everyone in the family can return items to their correct place. If the shelf is hard to reach store a small number of detergent pods in a container on top of the washing machine. Make sure the pods are well out of sight of little children, but that teenagers doing their own laundry

Read More